NetScaler 10.5 Upgrade - High Availability and Custom Theme
Upgrading NetScaler appliances should be part and parcel of the administration and maintenance process. The process is reasonably straight forward, however in this post I would like to address two complications which can cause hiccups to this procedure:
- 2 or more NetScalers in a High Availability configuration and how to apply upgrades with minimal end user impact
- Customisations applied to the NetScaler Gateway and how upgrades affect them
It should be stated that the update process in a High Availability pair can result in an almost undetectable down time, basically the only downtime that should occur will be when the pair is failed over from the primary to secondary node.
Before we begin, it’s a good idea to read the short reference article provided by Citrix.
Upgrading the first NetScaler
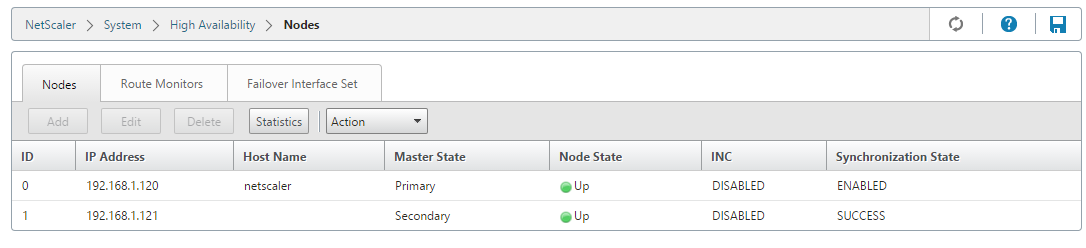
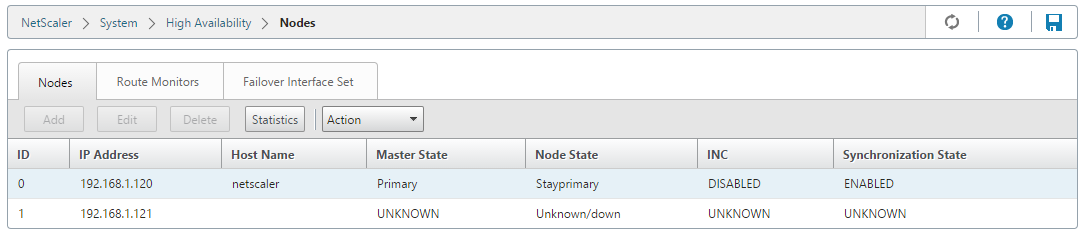
Let’s begin the process by logging into both of our NetScaler appliances from the web UI, by expanding the System menu item and clicking High Availability we can see all the nodes in the pair and which Master State they are in:
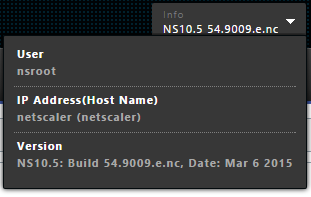
Switch to the node in the Primary state, you can see the current firmware version at the top of the screen, clicking the arrow gives some more detail, my NetScaler is currently running an ‘Enhanced’ release:
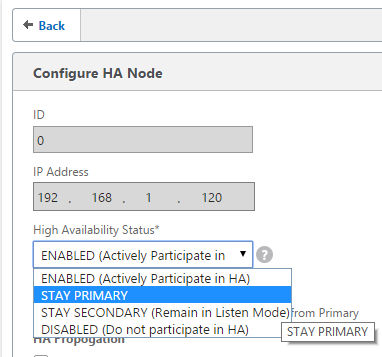
By going back to the High Availability section we can now move our NetScaler to Stay Primary mode, as the name suggests this forces the NetScaler HA pair to keep the node as Primary unless it goes down. Select the Primary node and click the Edit button, from the Configure HA Node menu switch the Status of the node to STAY PRIMARY:
The NetScalers shouldn’t switch Nodes at this stage, we are now ready to go back to our Secondary node and begin the upgrade process.
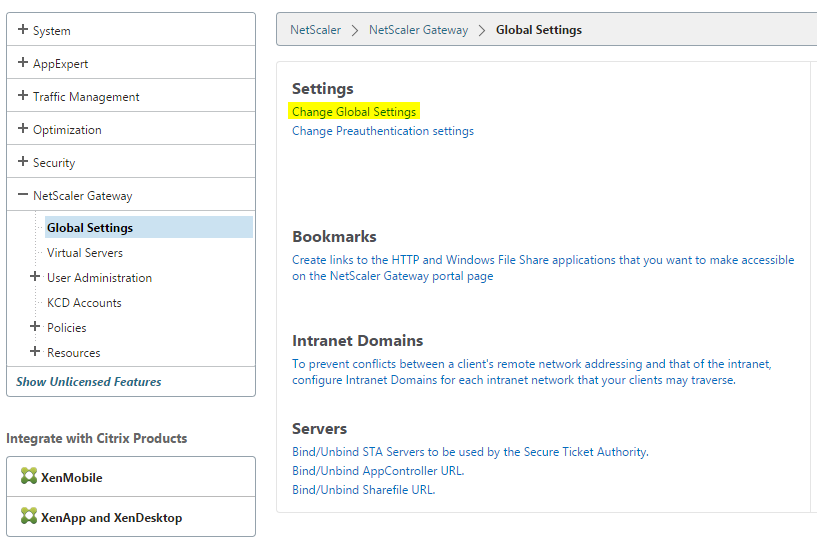
At this point jump back into the Secondary node and switch the custom theme to the Default or Green Bubbles theme, you can do this by opening the NetScaler Gateway tab, selecting Global Settings and click the Change Global Settings link:
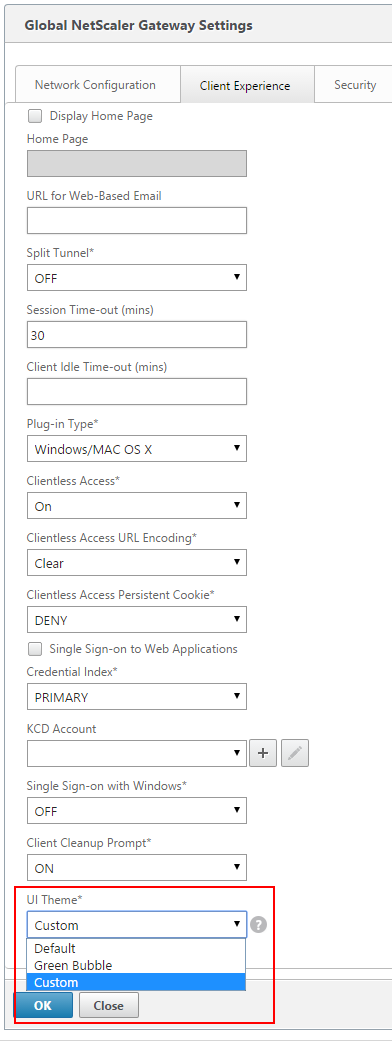
The above steps are important because the Custom theme, contains the entire ns_gui folder, part of this folder is the Access Gateway VPN client and EPA folders which would not be upgraded if we kept the old custom theme, but more importantly the old admin_ui folder would remain which would break any new admin pages in the new release of the firmware. For this reason we need to upgrade our custom theme - more on this later in the post.
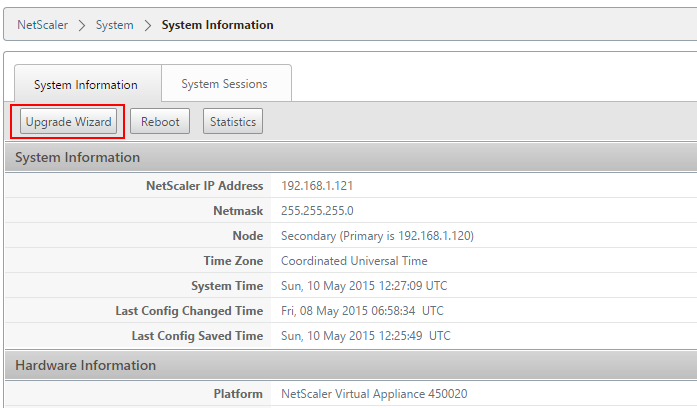
Hit the save button (so all of your running config is saved to ns.conf) at this point and fire up WinSCP or your favourite SFTP client and copy across your customtheme.tar.gz and the /flash/nsconfig folder. Once you have a backup, jump back into the web UI and select the Upgrade Wizard button from the System Information menu:
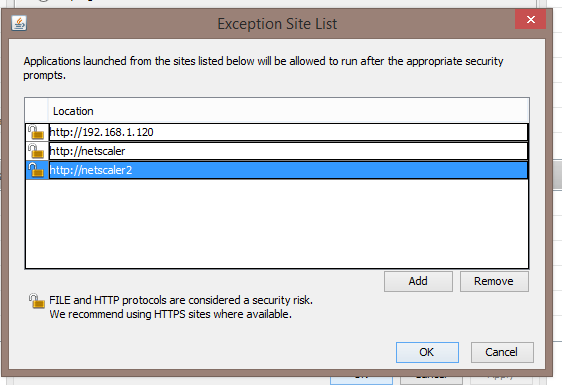
As the wizard is still written in Java, if you run into errors make sure your NetScaler URL is white listed in Java settings:
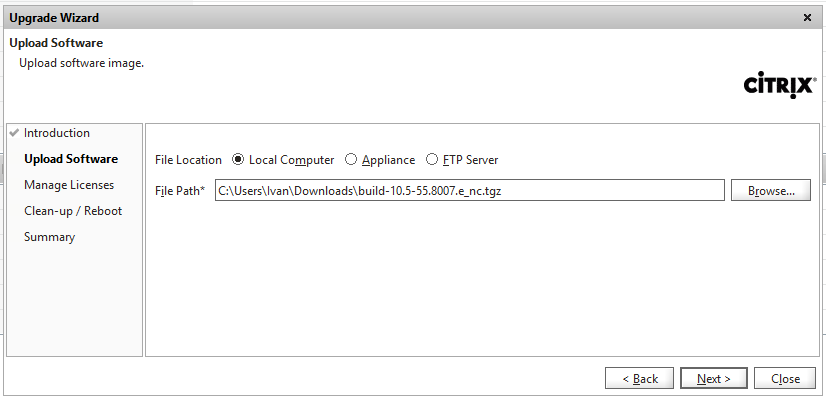
I still had issues with compatibility so I switched from Chrome to Internet Explorer. Once the wizard launches, click Next to continue onto the Upload Software screen, select Local Computer and browse to the gzip file you downloaded from Citrix.com, click Next:
The next screen allows you to change the licenses currently on the NetScaler, licensing is applied on reboot so any changes here will be reflected once the upgrade is complete, click Next when ready:

On the next screen select the Reboot option to have the NetScaler reboot itself after a successful installation, which saves you rebooting it manually. You can also elect to move some old kernel files and configuration files during this process, be warned however that I have had issues in the past with this process. As a general rule of thumb, I do not run the clean-up operation.
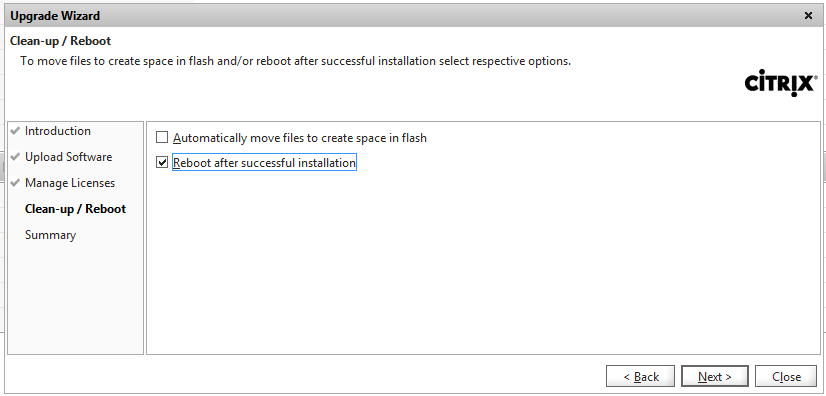
Click Next when ready and Finish on the next screen to begin uploading the firmware:
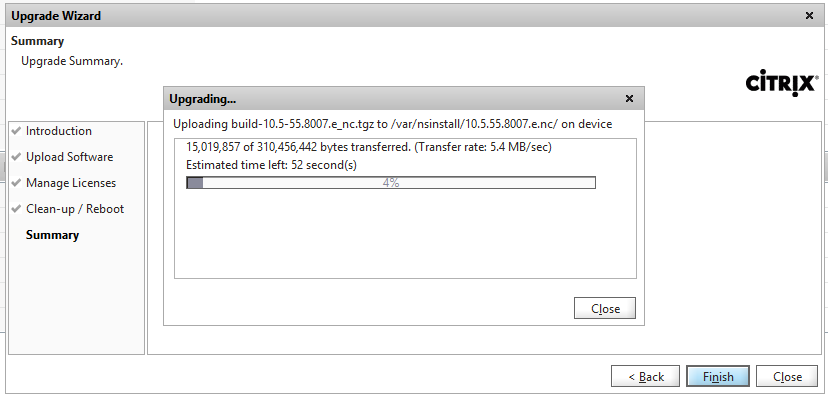
The firmware will begin extracting and installing:
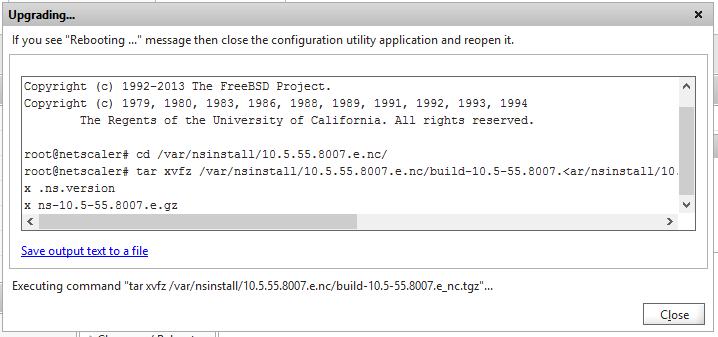
If you’re using an MPX appliance you will be prompted to enable the CallHome feature. If you’ve selected the reboot option the NetScaler will reboot once the script has completed. On our Primary node we can see the Secondary node is not responding:
Adjusting the Custom Theme
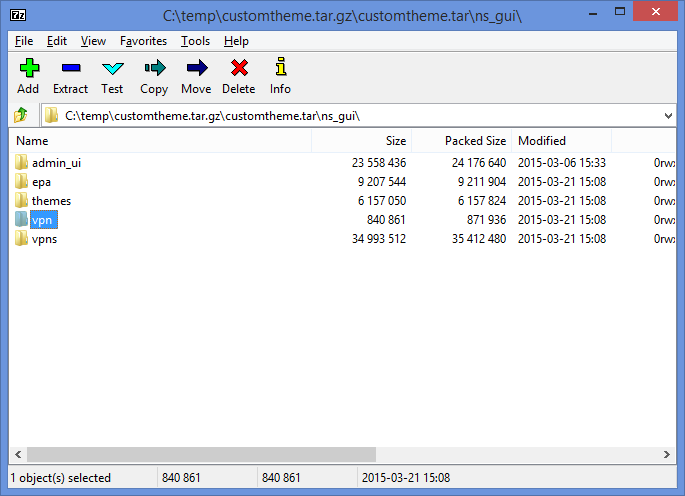
When the node comes back up re-connect your SFTP session and also launch an SSH session to the device. At this point we will repackage our custom theme, firstly unpack the vpn folder from the backup you took earlier, you will need to use a program similar to 7-Zip:
Our NetScaler should be using the Default or Green Bubbles theme. By having either of these themes selected, the NetScaler will have all of the updates applied to the epa and admin_ui folders. Open your SSH session and run the following commands to delete the existing custom theme gzip:
shell
rm /var/ns_gui_custom/customtheme.tar.gz
Let’s tar up the current Default/Green Bubbles theme to use as a base for our new custom theme:
cd /netscaler
tar -cvzf /var/ns_gui_custom/customtheme.tar.gz ns_gui/*
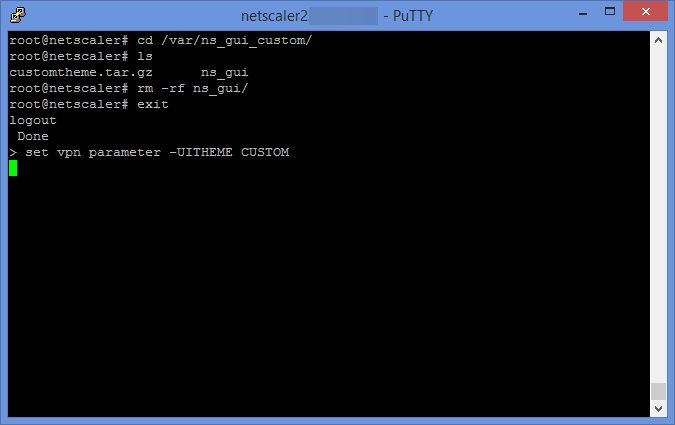
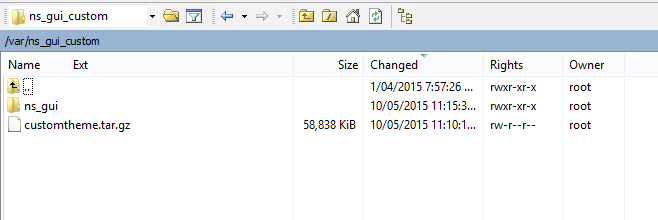
We can jump back into our /var/ns_gui_custom folder and check our new customtheme file is in there and also go ahead and delete the old ns_gui folder which the NetScaler uses to display the custom theme:
cd /var/ns_gui_custom/
rm -rf ns_gui/
At this point we can switch the NetScaler back to the custom theme (we can switch the theme from the console as per below or using the web UI), we should see the ns_gui folder get recreated now:
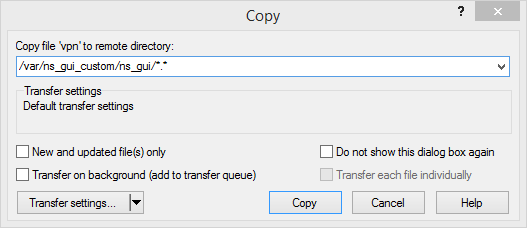
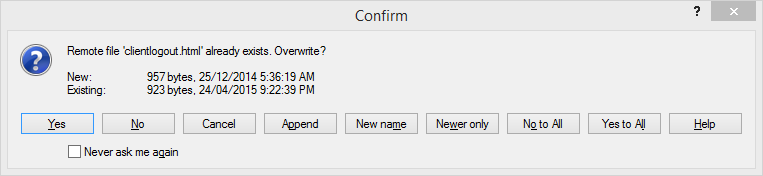
We can take the vpn folder we extracted earlier and copy it over the top of our current /var/ns_gui_custom/ns_gui/vpn/ folder, you will see lots of warnings about overwriting files, click Yes to All:
 ](/assets/2016/05/2015-05-10-23_17_36-Confirm.png)
Once complete we can tar up our new theme, the following commands delete the existing customtheme file and tar up our latest creation (new epa and admin_ui folders with the replaced vpn folder from our custom theme):
cd /var/ns_gui_custom/
rm customtheme.tar.gz
tar -cvzf /var/ns_gui_custom/customtheme.tar.gz ns_gui/*
Once complete we can copy the file back to our local machine so it can be applied to the Primary NetScaler once it has been upgraded. You should see a slight size difference between the two:

Upgrading the second NetScaler
Our Secondary node should now be up to date and ready to move into a Hot state so that we can perform the upgrade on the current Primary. We need to log onto the current Primary node and check the HA state, the Secondary node should be up. Select the Primary node, click the Edit button and switch out the HA Status back to Enabled, click Apply to return to the High Availability screen:
We force fail over by clicking the Edit button, selecting the Force Failover option and clicking Proceed. At this point the NetScalers will switch Primary/Secondary Node status, using ARP/GARP traffic will be switched across to the upgraded node, it is at this point a very short outage occurs. TLS/SSL sessions are dropped and reset (which may cause back end servers to request re-authentication from connected clients). ICA sessions will drop out and reconnect if Session Reliability is in use and configured correctly.
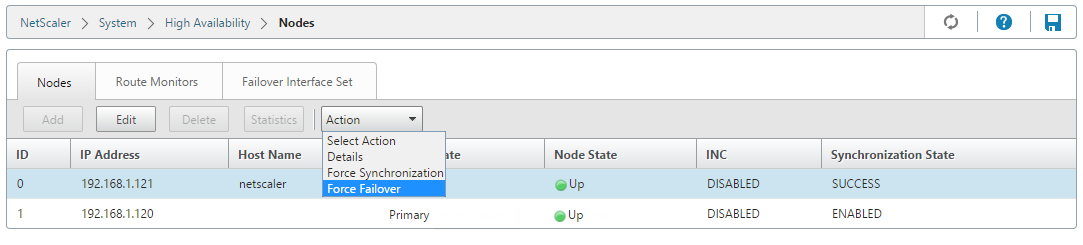
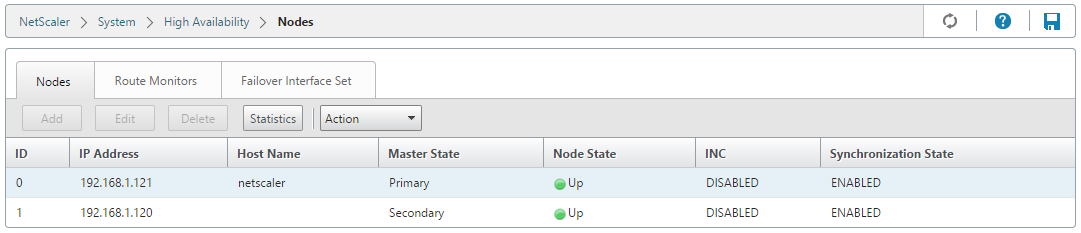
We should see the new node status:
The following actions should now be taken as per the instructions above:
- The upgraded node should now be set to Stay Primary;
- The secondary node needs to have the theme changed to Default or Green Bubble;
- The configuration should be saved and the
/flash/nsconfigfolder should be backed up; - The NetScaler can then be upgraded from the web UI;
- Once rebooted, the customtheme.tar.gz file and
/var/ns_gui_custom/ns_gui/folder can be deleted. - The new customtheme file can be uploaded to the NetScaler and the Custom theme enabled;
- Stay Primary can be removed from the Primary NetScaler and the configuration saved;
- The upgrade process is complete.
Troubleshooting - Invalid argument [ns]
![Invalid argument [ns]](/assets/2016/05/2015-05-10-22_50_25-Citrix-Login.png)
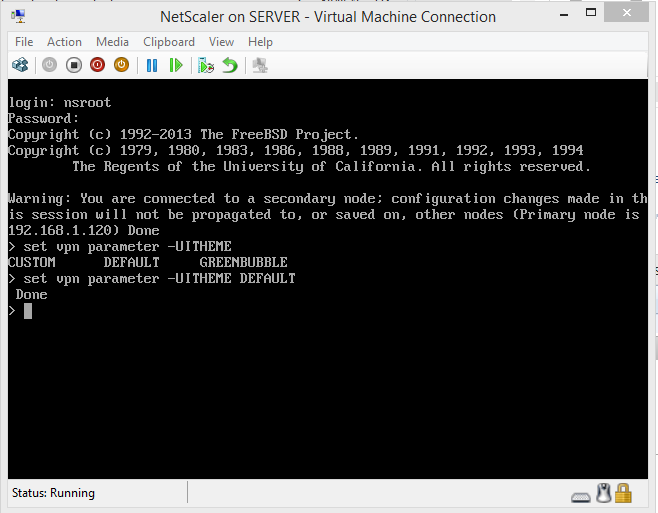
If you forgot to switch out the Custom theme for the Default/Green Bubbles themes before the upgrade you will likely receive and error such as Invalid argument [ns]. This occurs because the old admin_ui has been copied over the top of the new admin_ui folder, we need to switch the theme back to Default/Green Bubbles and then apply the Custom theme upgrade as per the above instructions. Without being able to log onto the web UI we need to connect the either the console of the NetScaler or SSH to it and issue the following command:
set vpn paramater -UITHEME DEFAULT