
NetScaler Gateway Customisation - Receiver X1/StoreFront 2.7
With the very recent release of Receiver X1 Tech Preview, Citrix has released the latest iteration of StoreFront - the new release has a large number of changes, most notably a complete redesign of the user interface.
A core component most clients are after is seamless integration for users between the NetScaler Access Gateway and the StoreFront UI. This translates to making sure our users are getting the same or at least a similar experience between logging on directly to Receiver for Web in the office and the Access Gateway when on the go.
Citrix currently releases NetScaler firmware with the classic Carbon theme and the Green Bubbles theme which pairs well with current version of StoreFront, obviously not so well with StoreFront 2.7! It’s almost certain that Citrix will release an updated theme to match the new UI in coming iterations of the NetScaler firmware but until so we are stuck modifying the themes currently available and using the Custom theme option for our Access Gateway.
This post serves two purposes, firstly to give a brief example on how we can customise the NetScaler Gateway to match the newly released StoreFront 2.7 and secondly as a reference guide for customising the NetScaler Gateway in general. There are many great articles and blog posts which describe this process (some of the key ones I like to use can be found at the end of this post) but I always wanted to create a single reference for some of the common elements I see clients requesting. It should be noted that I am no where near an expert on CSS or HTML, however I try to use code which is correct in it’s application and logical wherever possible - if you think there are elements which can be improved on please let me know.
Unfortunately, the customisation process for the Netscaler AG isn’t really the best in the world, much of the code in the Access Gateway is generated by JavaScript and some of the markup used is quite dated. Some of the modifications performed in this article aren’t really best practice but we need to work with the tools we are given and also take into consideration cost-benefit in terms of time to get things perfect vs end result obtained.
To start off we need 4 main tools:
- WinSCP to connect to our NetScaler and move files around
- PuTTY to establish an SSH connection and issue commands
- Notepad++Notepad++] or similar to edit CSS, JavaScript and HTML files
- Google ChromeGoogle Chrome] in Developer Tools mode or another web browser to edit pages on the fly
I use the above tools on a Windows system, any of the above tools can be substituted for other operating systems and tastes.
I have installed StoreFront 2.7 and used Google Chrome to pick out images and styling references, this can be seen throughout this article.
Creating our theme
We begin by ensuring our NetScaler is set to use the Green Bubbles theme under Netscaler Gateway > Global Settings > Change Global Settings > Client Experience > UI Theme. Once this is confirmed fire up PuTTY and connect to the console, next we need to issue the following commands
shell
This will move us into the FreeBSD portion of the NetScaler where we can modify the file structure.
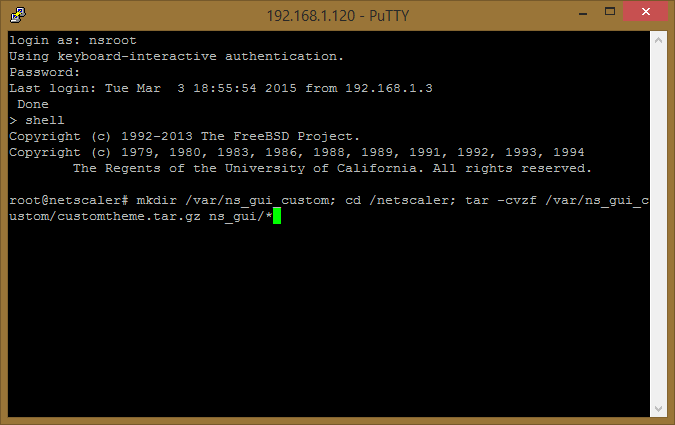
mkdir /var/ns_gui_custom
cd /netscaler
tar -cvzf /var/ns_gui_custom/customtheme.tar.gz ns_gui/*
The above commands create the ns_gui_custom folder, we move into the netscaler folder where the current running theme is stored and finally we tar the ns_gui folder into a customtheme.tar.gz file in the newly created ns_gui_custom folder. The following image depicts this process in a single command:
We need to switch our NetScaler to use the Custom theme now from the menu described above:

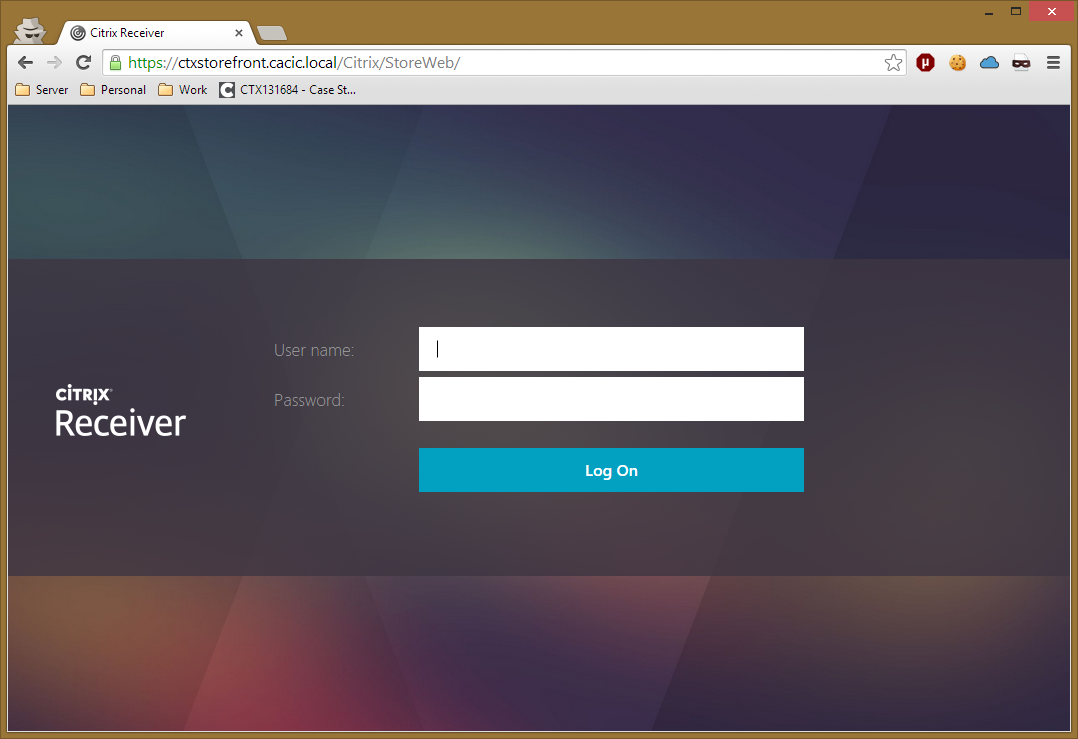
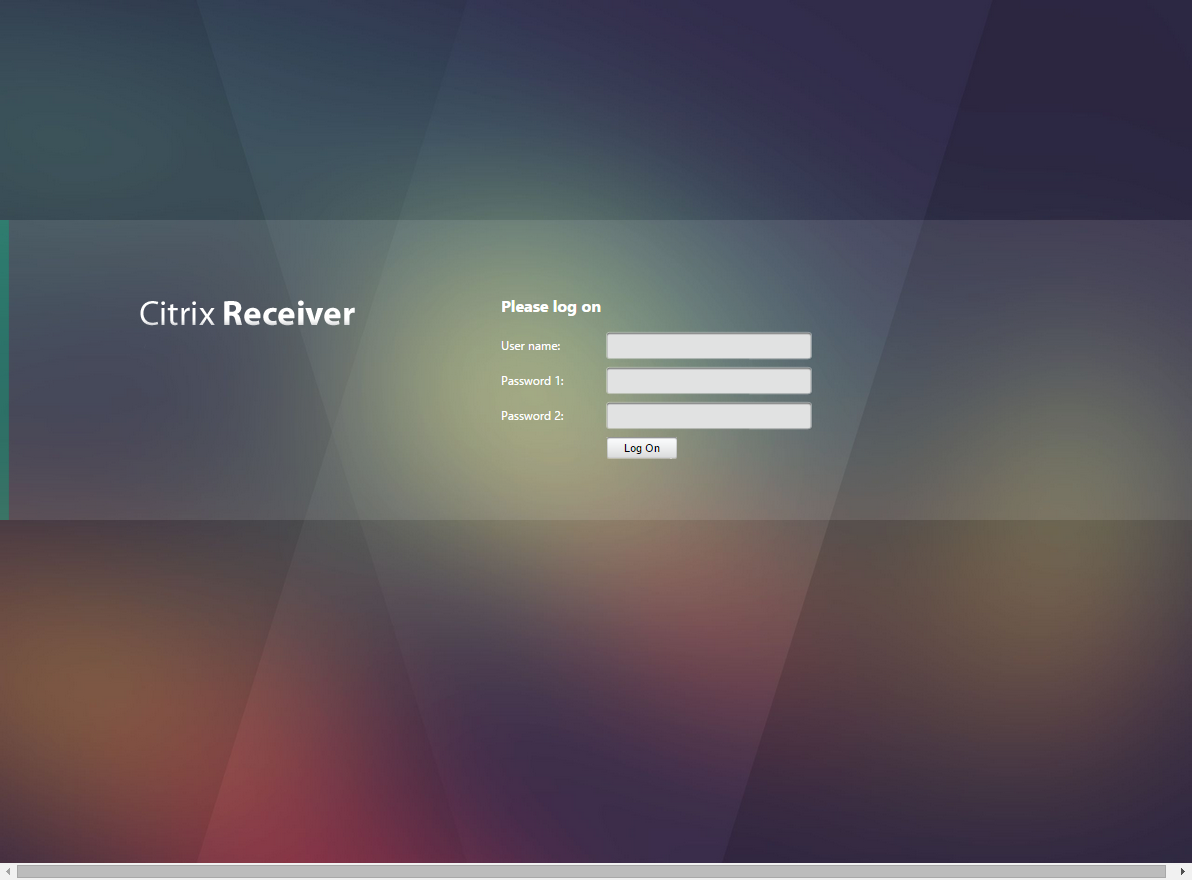
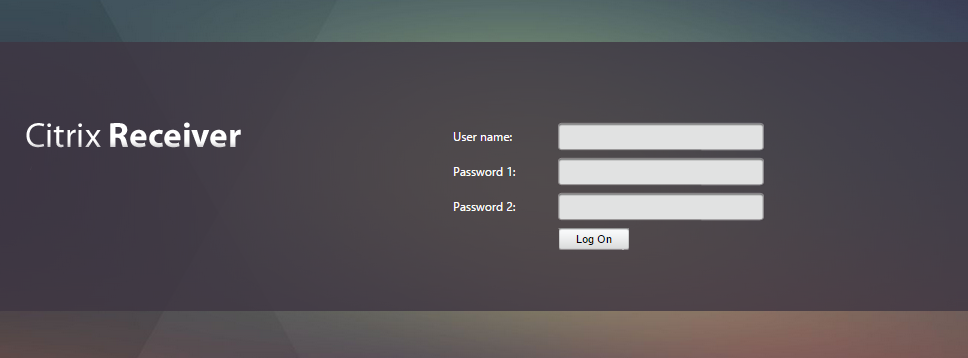
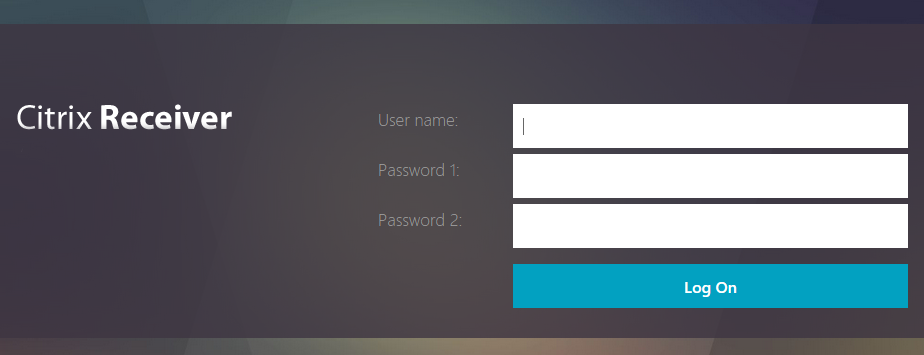
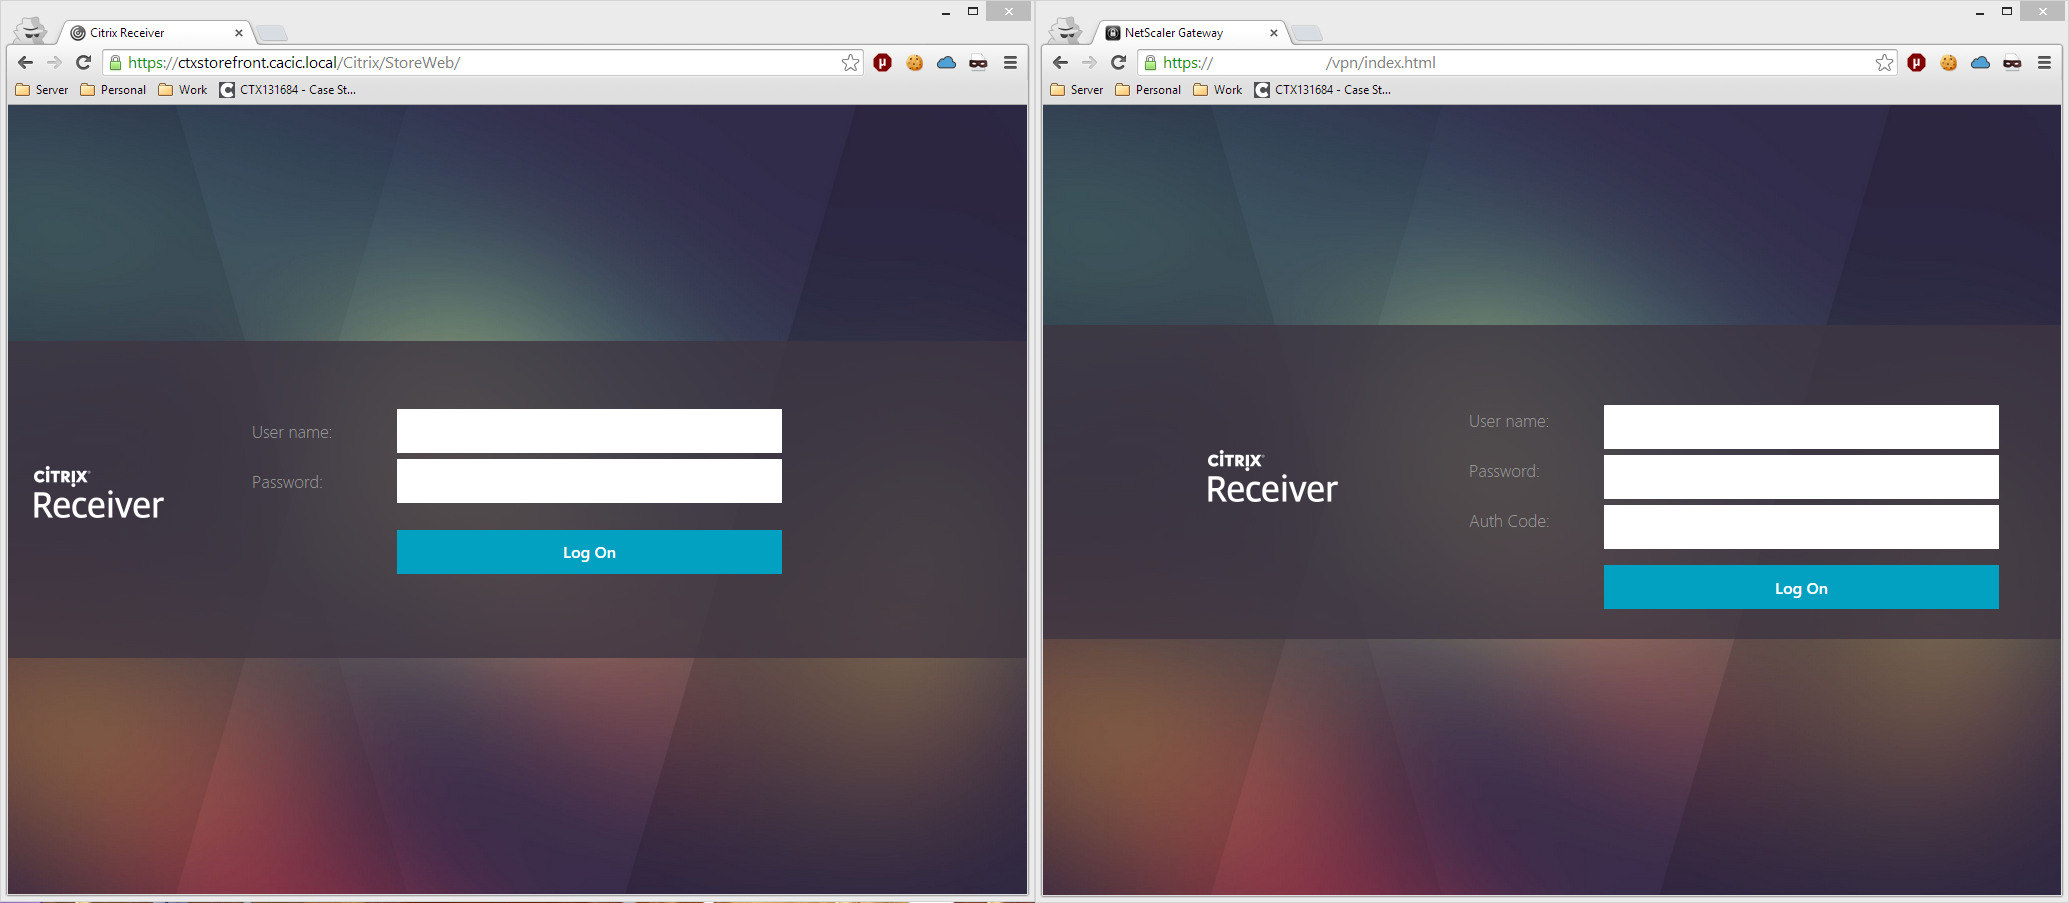
We should see the Green Bubbles theme if we go to the Access Gateway site, additionally the customtheme tar file should have extracted into the ns_gui_custom folder. As a reference your page should look something like this, I’m using two factor authentication so I have two sets of password fields:
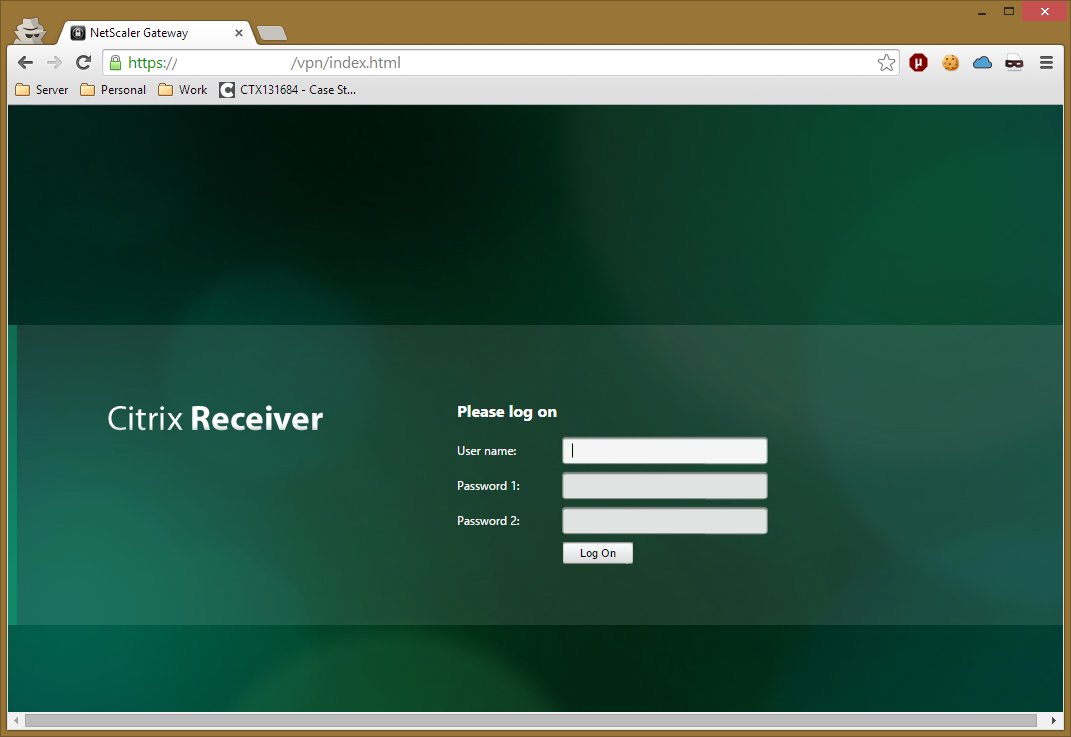
A number of issues already exist with the default theme, most notable for me is the horizontal scroll bar at the bottom of the page and the Password 1 and Password 2 fields, we’ll take care of this issues in a moment. Let’s begin editing the page by jumping into Developer Tools (F12 or Ctrl+Shift+I) and having a look at the code, the devtools also allow us to see what style sheet is referencing the element style and thus makes it easy to know where to make edits:
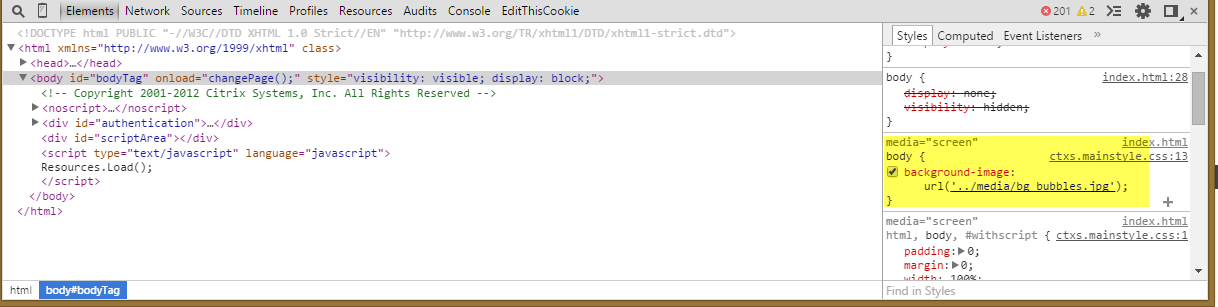
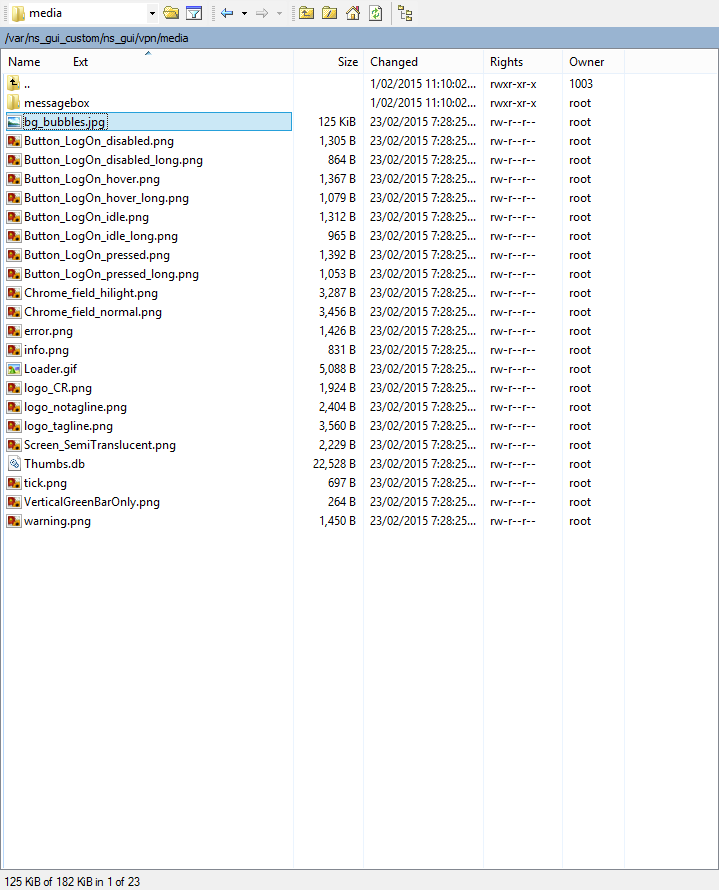
We can see the page is using a bg_bubbles.jpg file to serve the background image which is located in the /vpn/media/ folder, this translates to /var/ns_gui_custom/ns_gui/vpn/media/ on the NetScaler when browsing via WinSCP.
Changing the background image
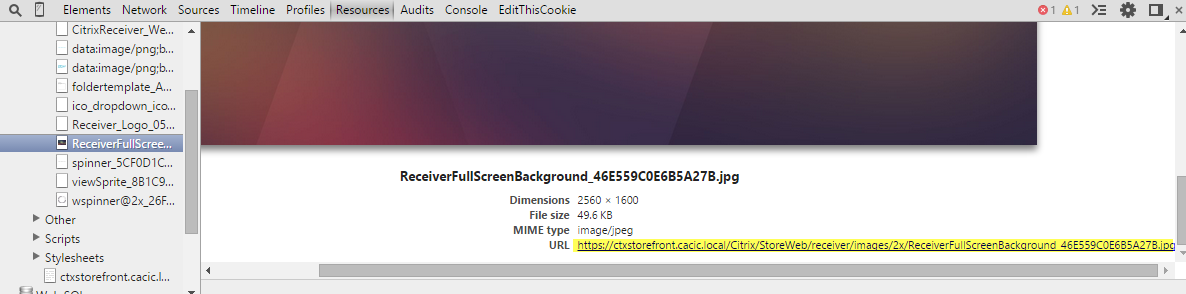
On the Receiver for Web page we can use Developer Tools to find the background image being used:
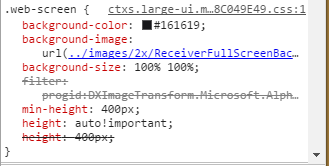
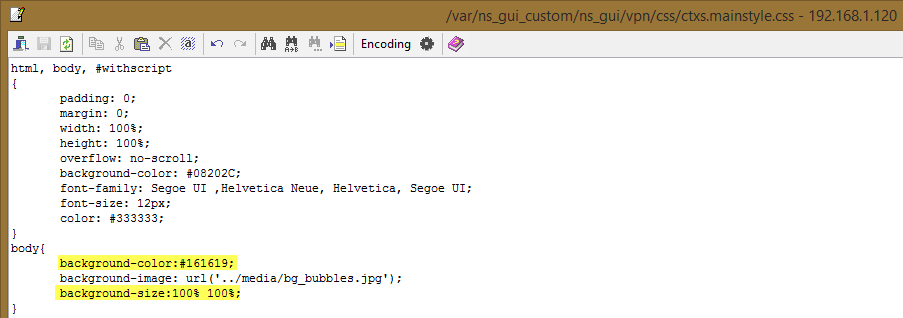
And then replace our bg_bubbles.jpg image with it (you may prefer to use a different name and edit the CSS instead), to match the style we need to edit the default background-color (seen for a few seconds before the image loads) and set the background to stretch - I use the built in WinSCP editor but you may wish to use Notepad++ or similar if you aren’t comfortable with editing CSS:
We should now have something like this (that pesky scrollbar is still there):
It’s also worth noting that changes are only made once the file(s) you are working on is saved, additionally changes can take up to 5 minutes to ‘sync’ - I’m not sure what causes this delay. It’s also a good idea to run this in a Incognito mode so cache and cookies are cleared easily.
Removing the horizontal scrollbar and green bar
To eliminate the scroll bar we need to remove a 9 pixel margin applied to the logonbox-innerbox element, while we’re at it lets also remove the green bar on the left hand side of the logonbox:
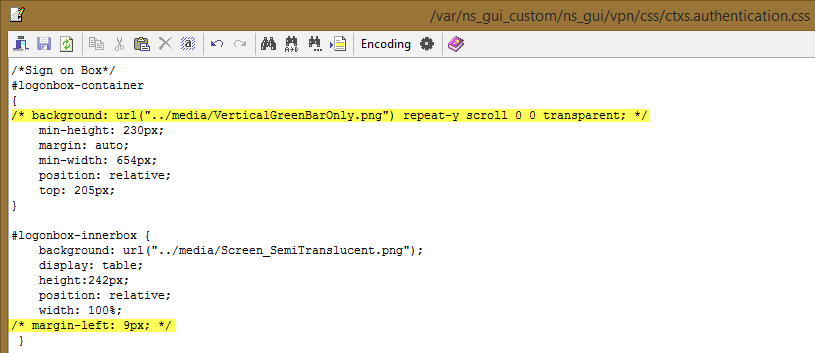
Our page should now have no horizontal scroll bar (if your monitor is wide enough) and the green bar should have vanished:
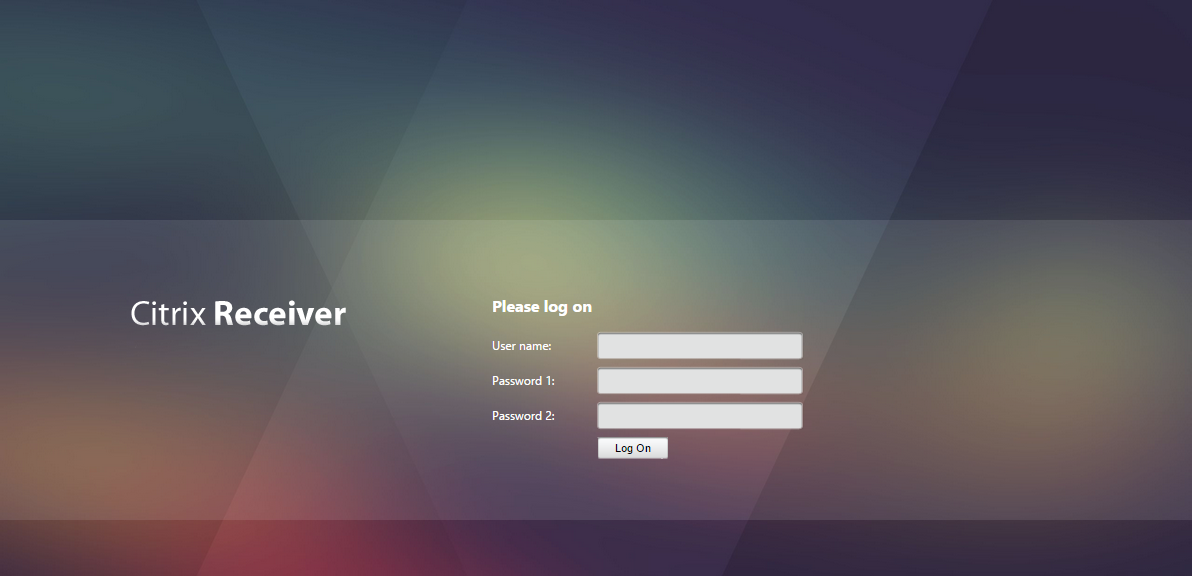
Changing the logonbox background colour
The next step is to change the colour of the logonbox and remove the Please log on text. We can grab the colour from our StoreFront 2.7 reference and create a custom style for the ct108_loginAgentCDAHeaderText2 id to hide it:
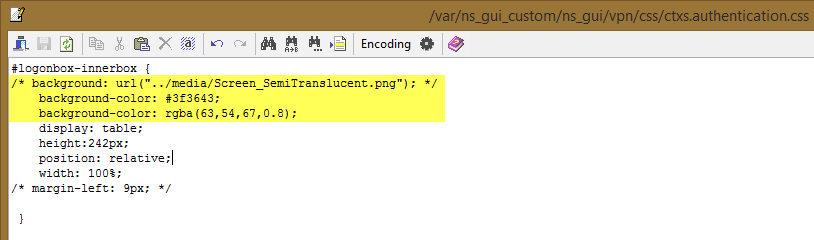

You may have noticed we are applying two sets of background colours to the logonbox, the first one acts as a catch-all for browsers which don’t support transparency, most browsers will apply the last background colour which has an 80% transparency. We should now have a colour scheme that matches up pretty well:
Styling our login form boxes and button
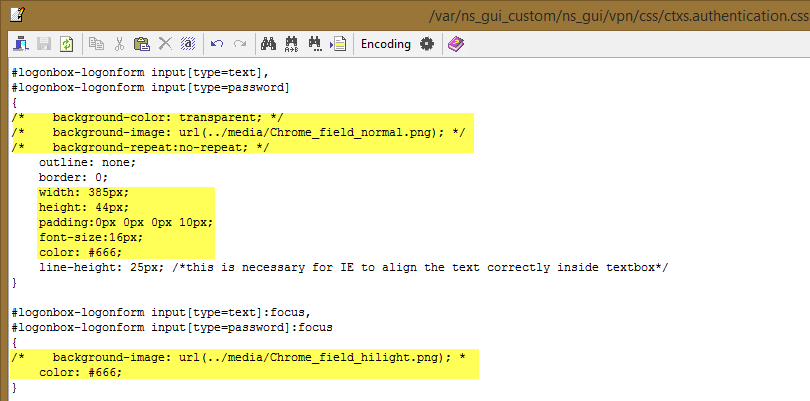
Next we’ll set our login boxes, text and login button to match the StoreFront 2.7 theme, lets tackle switching out the form boxes first, we need to size them appropriately and remove the background images, essentially we are just after white rectangles:
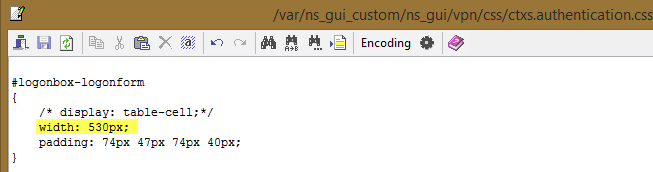
The div holding the logon form is actually a little too small for our new larger login boxes so lets increase the size on that too:
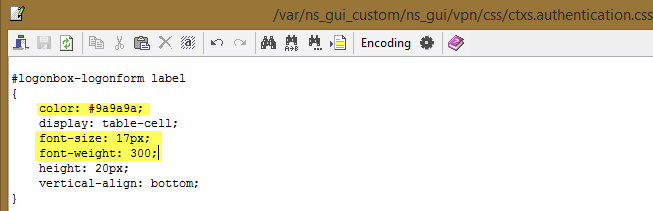
The User name and Password labels need the font size increased, colour changed and weight decreased:

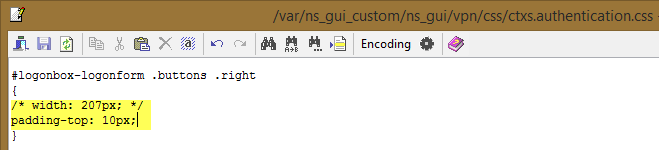
The Log On button is next, a div is used to centre it, because our new button will be quite wide we want it to start from the very left edge, so let’s comment out the width which floats it in the middle, we’ll also add some padding at the top so it has a bit of a gap below the Password form:
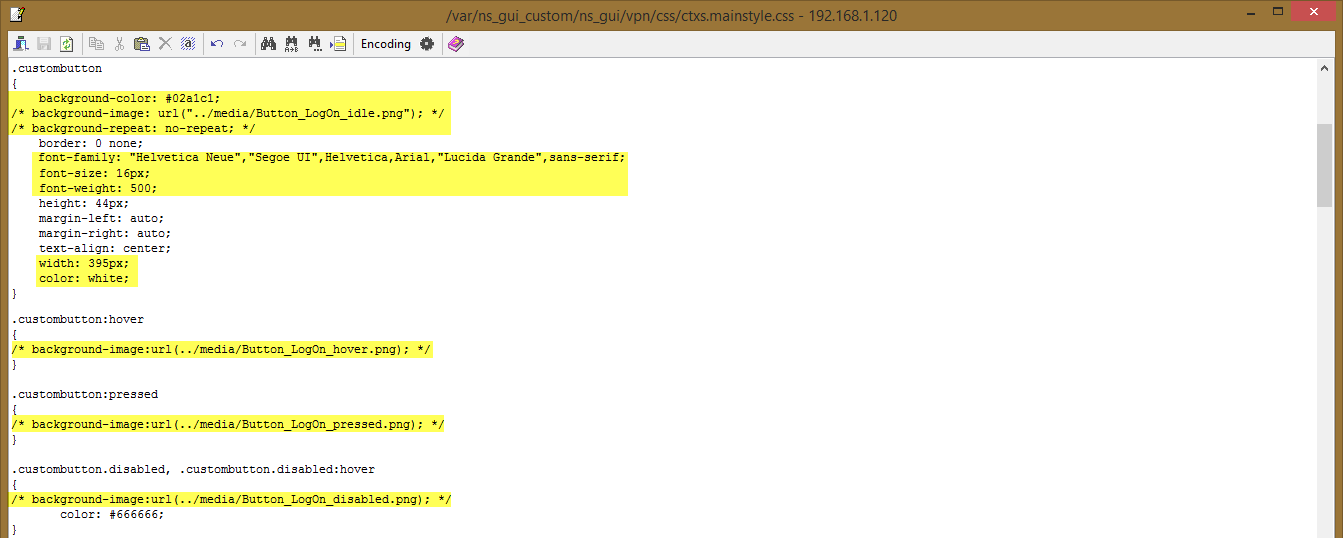
To get our styling right we need to change the colour of the box, remove all the images used for animation, set the correct font family, size and weight, stretch the button out to match our form fields and make the text colour white:
Here’s our result so far:
Password 1 and Password 2 text change
Let’s look at sorting out the Password 1 and Password 2 text, this happens when we use a second authentication method on our Access Gateway. We can change this text with a Rewrite on the NetScaler, but because we are already editing the theme lets save the NetScaler some work and do it the old fashioned way. This text gets generated using some JavaScript, the Password 2 label is a direct grab from the resources/en.xml file, you’ll need to edit the other languages separately if they will be used in your environment:

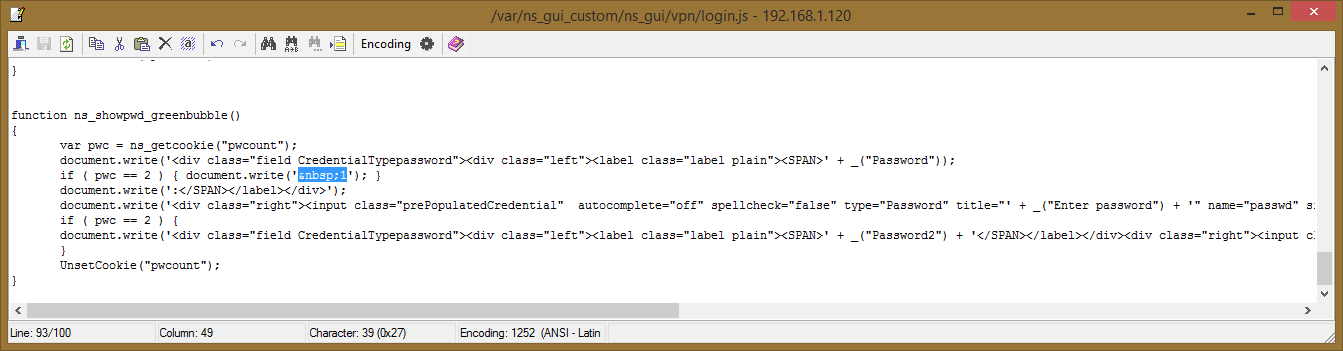
Switch the above text out for what you desire, I went with Auth Code. The Password 1 label gets generated in the login.js file in the root of the vpn directory, the JavaScript simply appends to our regular Password field if we are using multiple authentication methods. Simply remove the text below to restore the regular Password field name:
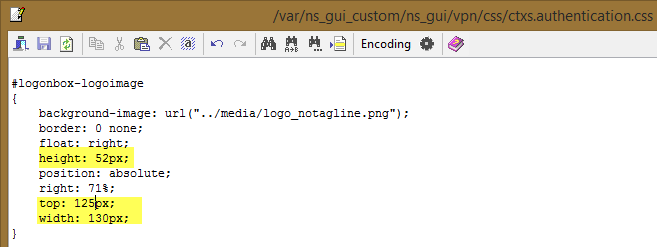
Changing the Citrix Receiver logo
This part of the guide is not really necessary but it demonstrates how we can switch the logo out for a company logo or similar, I grabbed the StoreFront 2.7 logo using the Google Chrome devtools again and used it to replace the logo_notagline.png image. I also adjusted the height, width and top position so I could centre the logo:
Final Results
We are pretty much done now, let’s compare our result to the StoreFront 2.7 theme:
Not bad at all, of course there’s always room for improvement! The way the NetScaler Access Gateway pages are coded makes it quite difficult the achieve exactly the same results, with enough time and tinkering you could generate a page which is identical to the StoreFront 2.7 one.
Saving our work
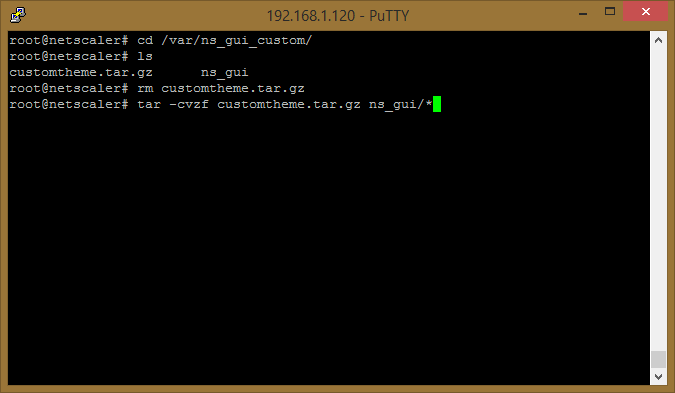
Now that we are happy with out results lets ‘tar up’ our theme and distribute it to any NetScalers we may have in High Availability. We’ll use the following commands:
cd /var/ns_gui_custom/
rm customtheme.tar.gz
This will delete our current customtheme file which is just the original GreenBubbles theme.
tar -cvzf customtheme.tar.gz ns_gui/*
We now have a new customtheme.tar.gz file ready for distribution and backup.
All done!
Notes and Considerations
Some other things you may want to consider changing in a production environment include:
- The title text from NetScaler Gateway to something more relevant for our end users
- The favicon to a company logo
- A div at the bottom of the page with the help desk support email or number
I also wanted to share some resources which I found quite useful:
- Creating a Custom Theme for the Logon Page
- How to Customize the Logon Page of Access Gateway Enterprise Edition Release 9.2 Appliance
Lastly, when upgrading the NetScaler firmware, you may find issues with your Admin pages, before commencing you should switch to the default theme, upgrade the NetScaler and then switch back to the custom theme. You may get errors about UI elements being broken at this stage, this occurs because the admin_ui folder is bundled in the tarball and we are now applying an old version of this UI on our new firmware. The fix is to re-tar the current theme and then make the changes necessary (you can generally just copy over your images, CSS and JavaScript files).